
Construction training
-
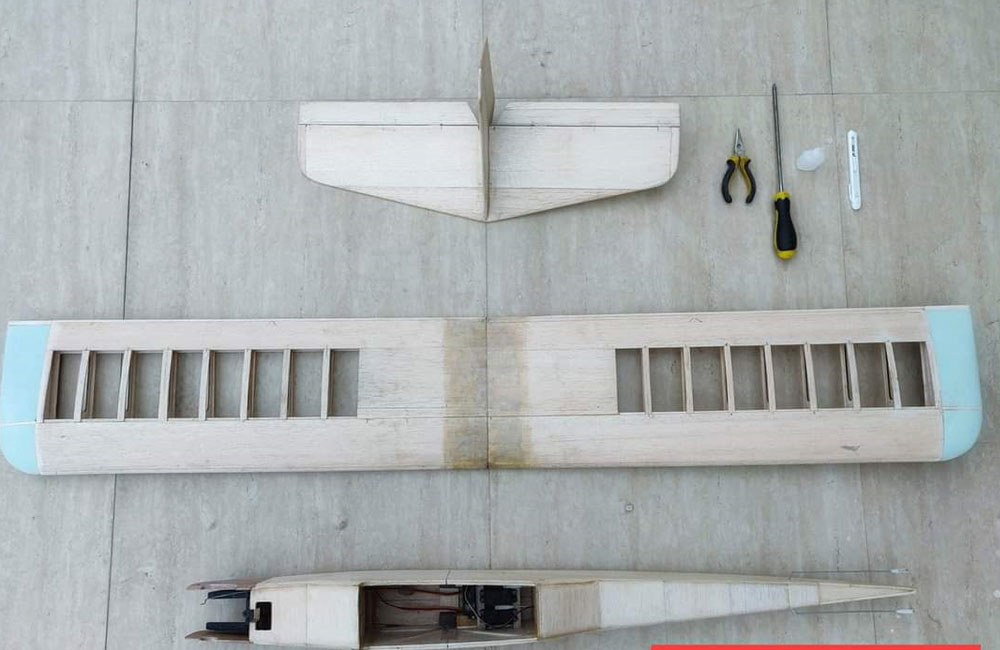
- Find suitable material like Balsa wood
- Pick your electronics
- You will need to choose what electronics to use for your aircraft. Pick a motor and battery that will give you a decent amount of thrust, and fair flight time.
- Once you do this, you can then pick an ESC (Electronic Speed Controller) that can handle the Amperage draw of the motor.

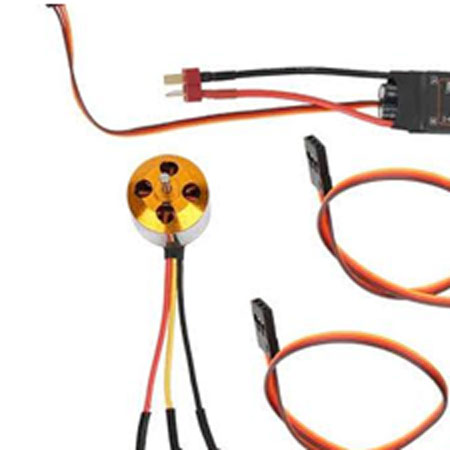
Motors, ESC and servo
- Choose motor according to your plane.which provide sufficient thrust to plane for fly.
- Choose ESC (Electronic speed controller) According to motor load.
- For example – if your motor consume 15A then choose 30A ESC.it will run motor with damaging itself and remain cool.
- Choose servo according to plane size.
Choose Lipo battery
- Choosing Lipo battery is the most important part of plane construction.
Tips for choosing Lipo battery
- Higher C rating means higher Amps.
- Number of cells.its depend on your motor and Esc configuration.
- Choose Lipo mAh according to usage.

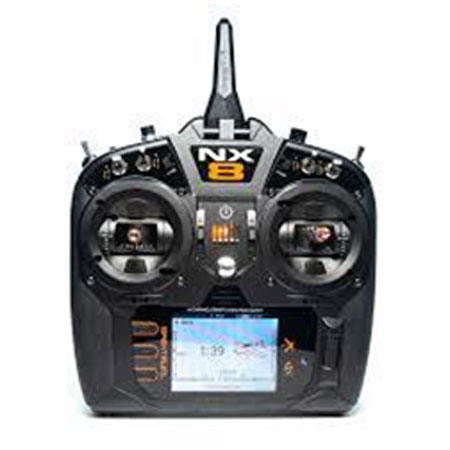
Choose a transmitter
Determine what controls you want your model to have, and purchase an appropriate Receiver. For example, I wanted my twin to have Elevator, Ailerons, Rudder, Flaps, and throttle control. This is 5 channels, so I will need at least a 5 channel receiver.
Built fuselage and tail
- The fuselage can be any length you want (to a certain degree) as long as you get the center of gravity right. While drawing out your model, just make a fuselage that makes the plane look good.
- Built the horizontal and vertical stabilizers.

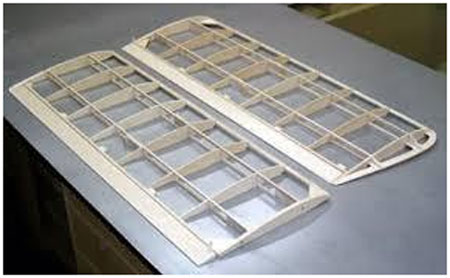
Build your wing
- You need your wing to be very strong to withstand the forces during flight.
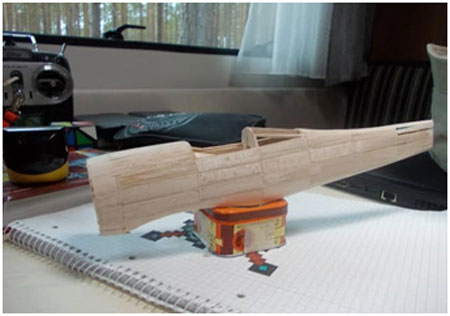
Make a strong motor mount
- You want to be sure that your motor mount is strong enough that it won’t rip of when you turn the motor on.
Find wing placement
- Now you need to find the center of gravity of the fuselage so you know where to mount the wing. Place the batteries in a neutral spot, so you can move them a couple inches forward or backwards, and then place you fingers on the fuselage until you get it to balance level.
Attach control Horns and Pushrods
- You need to transfer the movement of the servo to the movement of the control surface.
Landing Gear
- Now you must decide if your model should have landing gear. If the answer is yes, I would strongly recommend using the taildragger style (Where 2 wheels are in the front and a small tail wheel or skid is in the rear) as this is easier to make strong than Tricycle Style Landing Gear.
Glide Test
- Now, with everything set as it would be if you were ready to fly, make sure that all control surfaces are neutral, especially the elevator. Take your plane and run with it above your head, and let it go for just a second or two. In those seconds, see if the plane dips its nose down. If it does just a bit, it is balanced well. If it tries to nosedive, it is nose heavy. And if it wants to go up, and flip backwards, it is tail heavy.
Test Control Direction and Motor Rotation
- Now, with everything set as it would be if you were ready to fly, make sure that all control surfaces are neutral, especially the elevator. Take your plane and run with it above your head, and let it go for just a second or two. In those seconds, see if the plane dips its nose down. If it does just a bit, it is balanced well. If it tries to nosedive, it is nose heavy. And if it wants to go up, and flip backwards, it is tail heavy.
Right Stick
- UP – Elevator moves down
- DOWN – Elevator movesup (These are confusing at first, but think of it as moving the stick back tilts the plane back, it doesn’t make it go up)
- LEFT – Right Aileron moves down & Left Aileron moves up.
- RIGHT – Right Aileron moves up & Left Aileron moves down.
Left Stick
UP – Motor turns on
DOWN – Motor turns off
LEFT – Rudder moves Left
RIght – Rudder moves Right
Maiden Flight
- Now its the moment you’ve been waiting for. Time to see if your calculations and designs were correct. Before you maiden your new plane, you should do a range test, to ensure you have a strong radio signal. (Range Check is a mode you put your transmitter in that reduces the power to simulate as if the plane were really far away.) Many transmitters are different, so check your manual to see how to do this. Once in “Range Check” mode, walk in a large circle around your plane while moving the controls. Make sure that you always have control over the plane.
- After this, your ready to fly! Make sure you have a fully charged battery, check the CG one last time, and just go for it! Throttle up to full power, and pull back on the elevator. Expect the plane to be unstable and be ready for some aggressive controls.
Trim your Plane to Fly perfectly
- Once in the air, use your trim tabs to make the plane fly level. If you feel the plane wants to nosedive, then it may be nose heavy. Try moving the battery forwards and backwards to change the Center of Gravity.
- Many of my planes want to climb aggressively when full power is applied. To combat this, Put some washers or plastic rings (such as the ones that come with your propellers) on the upper 2 screws of the motor mount, between the popsicle sticks, and the motor. This tilts the motor down a bit, dampening this effect.
- After a while of changing the trims, CG, and motor angle, you will get your plane flying great!
It’s really a cool and helpful piece of info.
I’m happy that you just shared this helpful info with us.
Please keep us informed like this. Thanks for sharing.